0.介紹
Tesseract是一個開源的OCR引擎,能識別100多種語言(中,英,韓,日,德,法…等等),但是Tesseract對手寫的識別能力較差。
1.安裝

2.下載語言庫
下載地址:https://github.com/tesseract-ocr/tessdata
根據自己的需求選擇所要的語言庫,在這裡我們選擇的是簡體中文所以選擇的庫是:chi_sim.traineddata
將檔案複製到到:/usr/local/Cellar/tesseract/3.04.01_2/share/tessdata目錄下。
3.Tesseract使用
終端輸入命令:tesseract --help

一般使用:
//預設使用eng文字型檔, imgName是圖片的地址,result識別結果
tesseract imgName result
指定語言:
//指定使用簡體中文
tesseract -l chi_sim imgName result

//檢視本地存在的語言庫
tesseract --list-langs
指定多語言:
//指定多語言,用+號相連
tesseract -l chi_sim+eng imgName result
有個地方需要特別註意,引數psm
//輸入命令,檢視psm的引數
tesseract --help-psm
  0    Orientation and script detection (OSD) only.
  1    Automatic page segmentation with OSD.
  2    Automatic page segmentation, but no OSD, or OCR.
  3    Fully automatic page segmentation, but no OSD. (Default)
  4    Assume a single column of text of variable sizes.
  5    Assume a single uniform block of vertically aligned text.
  6    Assume a single uniform block of text.
  7    Treat the image as a single text line.
  8    Treat the image as a single word.
  9    Treat the image as a single word in a circle.
 10    Treat the image as a single character.

 翻譯(可能不是很準,最好看原文):
 0 定向指令碼監測(OSD)
 1 使用OSD自動分頁
 2 自動分頁,但是不使用OSD或OCR(Optical Character Recognition,光學字元識別)
 3 全自動分頁,但是沒有使用OSD(預設)
 4 假設可變大小的一個文字列。
 5 假設垂直對齊文字的單個統一塊。
 6 假設一個統一的文字塊。
 7 將影象視為單個文字行。
 8 將影象視為單個詞。
 9 將影象視為圓中的單個詞。
 10 將影象視為單個字元。
根據情況選擇不同的psm值,這很重要,如果選擇到不恰當的值會導致識別失敗。
比如:

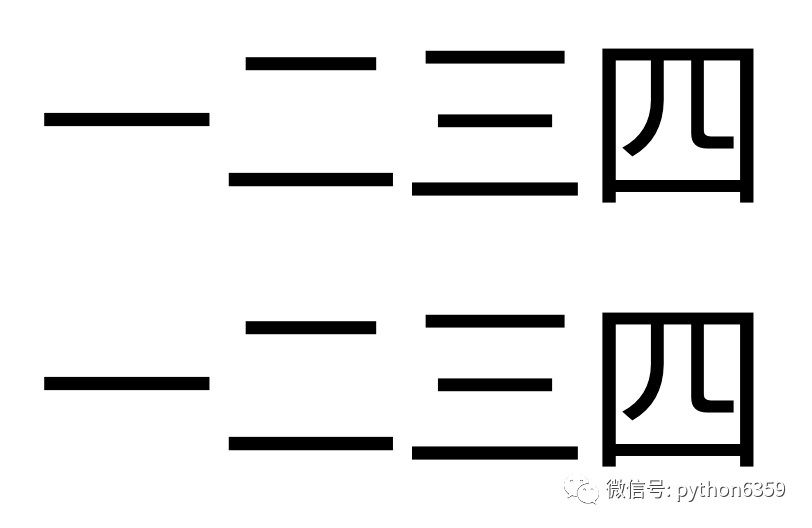
1234.png
使用命令:
//不設定psm值的命令
tesseract 1234.png 1234 -l chi_sim

列印:
Tesseract Open Source OCR Engine v3.04.01 with Leptonica
Info in fopenReadFromMemory: work-around: writing to a temp file
Empty page!!
Empty page!!

//不設定psm值的命令
tesseract 1234.png 1234 -l chi_sim -psm 6

成功識別:
一二三四
一二三四
4.語言訓練
提前準備:
1.training tools。(在安裝tesseract時候執行brew install --with-training-tools tesseract這句命令會同時安裝training tools)
2.jTessBoxEditor工具。
3.訓練素材
在這裡準備的素材如下:

hui.png

yi.png
執行命令:
tesseract hui.png hui -l chi_sim -psm 10
識別結果:瞧

tesseract yi.png yi -l chi_sim -psm 10
識別結果:=
顯然自帶chi_sim庫對隳易這兩個字的識別不是很好。為了識別這兩個字,我們要對這兩個字進行訓練。
1.素材合成,(多個素材合成)
開啟jTessBoxEditor工具,選單欄:tools->Merge TIFF...,選中要合成的圖片並儲存為為:huiyi.fitt。
2.生成box檔案
//命令
tesseract huiyi.tif huiyi -l chi_sim -psm 10 batch.nochop makebox執行後會在生成一個名為huiyi.box的box檔案。
用文字編輯器或者xcode開啟:
瞧 31 37 112 119 0
= 51 86 93 106 1
修改為:
隳 31 37 112 119 0
易 51 86 93 106 1
儲存檔案。
3.生成.tr檔案
//命令
tesseract huiyi.tif huiyi -psm 10 nobatch box.train
4.生成unicharset檔案
//命令
unicharset_extractor huiyi.box註意unicharset_extractor命令是training tools裡面的整合命令,如果執行時說沒有找到該命令則說明你沒有安裝training tools。
5.建立font_properties檔案
字型特徵檔案,Tesseract-OCR 3.01 及以上版本在訓練之前都要建立font_properties檔案。檔案格式內容格式如下:
fontname italic bold fixed serif fraktur

//翻譯
字型名字 傾斜 加粗 固定寬度 襯線體 哥特字型
除了字型之外其他的值都是bool值,0或1
在這裡font_properties的內容是:
font 0 0 0 0 0執行命令:
echo 'font 0 0 0 0 0' > font_properties5.training
執行命令:
shapeclustering -F font_properties -U unicharset huiyi.tr會生成:shapetable檔案,重新命名為huiyi.shapetable
執行命令:
mftraining -F font_properties -U unicharset -O huiyi.unicharset huiyi.tr會生成:huiyi.unicharset、inttemp,pffmtable檔案,將inttemp,pffmtable重新命名為:huiyi.inttemp,huiyi.pffmtable
執行命令:
cntraining huiyi.tr會生成:normproto檔案,重新命名為huiyi.normproto
6.得到traineddata檔案
執行命令:
combine_tessdata huiyi.

//列印
Combining tessdata files
TessdataManager combined tesseract data files.
Offset for type  0 (huiyi.config                ) is -1
Offset for type  1 (huiyi.unicharset            ) is 140
Offset for type  2 (huiyi.unicharambigs         ) is -1
Offset for type  3 (huiyi.inttemp               ) is 406
Offset for type  4 (huiyi.pffmtable             ) is 118222
Offset for type  5 (huiyi.normproto             ) is 118282
Offset for type  6 (huiyi.punc-dawg             ) is -1
Offset for type  7 (huiyi.word-dawg             ) is -1
Offset for type  8 (huiyi.number-dawg           ) is -1
Offset for type  9 (huiyi.freq-dawg             ) is -1
Offset for type 10 (huiyi.fixed-length-dawgs    ) is -1
Offset for type 11 (huiyi.cube-unicharset       ) is -1
Offset for type 12 (huiyi.cube-word-dawg        ) is -1
Offset for type 13 (huiyi.shapetable            ) is 118708
Offset for type 14 (huiyi.bigram-dawg           ) is -1
Offset for type 15 (huiyi.unambig-dawg          ) is -1
Offset for type 16 (huiyi.params-model          ) is -1
Output huiyi.traineddata created successfully.將huiyi.traineddata移動到/usr/local/Cellar/tesseract/3.04.01_2/share/tessdata/目錄下
執行命令:
cp huiyi.traineddata /usr/local/Cellar/tesseract/3.04.01_2/share/tessdata/7.驗證
執行命令:
tesseract hui.png hui -l huiyi -psm 10
識別結果:瞧

tesseract yi.png yi -l huiyi -psm 10
識別結果:易
成功識別。
結語:好久沒寫了,這篇是之前就寫好的,一直沒發,剛過完年諸事繁忙,一直沒時間寫。在新的一年祝各位同仁前程似景。最近看下有沒有時間將Tesseract遷移到iOS上,之前試過效果並不好,主要是識別速度偏慢,而且還沒有一個很好的灰度演演算法用來處理圖片。
 知識星球
知識星球