(點選上方公眾號,可快速關註)
來源:袁鳴凱 ,
blog.csdn.net/lifetragedy/article/details/7801983
四、使用SWA(Soap WithAttachment)來進行附件傳送
有了上面兩個例子的基礎後,我們將使用這個例子來結束Axis2中的Soap特性的教學。
在Axis2中傳輸附件有兩種形式,一種叫MTOM,一種就是SWA。
SWAP即Soap With Attachment,這是業界的標準。
所謂的SWA傳輸,即客戶端把需要上傳的檔案,編譯成兩進位制程式碼凌晨隨著soap的request一起推送到服務端,該兩進位制程式碼以AttachmentId的形式來表示,即如下這樣的一個soap body:
test.jpg
urn:uuid:8B43A26FEE1492F85A1343628038693
服務端收到該soap的request可以直接使用如下的陳述句將這個AttachmentId還原成輸出流:
DataHandler dataHandler = attachment.getDataHandler(attchmentID);
File file = new File(uploadFilePath.toString());
fileOutputStream = new FileOutputStream(file);
dataHandler.writeTo(fileOutputStream);
fileOutputStream.flush();
在我們這個例子內,我們將使用客戶端上傳一個jpg檔案,服務端收到該jpg檔案(可以是任何的兩進位制檔案)後解析後存入服務端的一個目錄。
先來看服務端程式碼
org.sky.axis2.attachment.FileUploadService
package org.sky.axis2.attachment;
import java.io.File;
import java.io.FileOutputStream;
import java.io.IOException;
import javax.activation.DataHandler;
import org.apache.axiom.attachments.Attachments;
import org.apache.axis2.context.MessageContext;
import org.sky.axis2.util.UUID;
public class FileUploadService {
public String uploadFile(String name, String attchmentID) throws Exception {
FileOutputStream fileOutputStream = null;
StringBuffer uploadFilePath = new StringBuffer();
String fileNamePrefix = “”;
String fileName = “”;
try {
MessageContext msgCtx = MessageContext.getCurrentMessageContext();
Attachments attachment = msgCtx.getAttachmentMap();
DataHandler dataHandler = attachment.getDataHandler(attchmentID);
fileNamePrefix = name.substring(name.indexOf(“.”), name.length());
fileName = UUID.getUUID();
System.out.println(“fileName=====” + fileName);
System.out.println(“fileNamePrefix====” + fileNamePrefix);
uploadFilePath.append(“D:/upload/axis2/”);
uploadFilePath.append(fileName);
uploadFilePath.append(fileNamePrefix);
System.out
.println(“uploadFilePath====” + uploadFilePath.toString());
File file = new File(uploadFilePath.toString());
fileOutputStream = new FileOutputStream(file);
dataHandler.writeTo(fileOutputStream);
fileOutputStream.flush();
} catch (Exception e) {
throw new Exception(e);
} finally {
try {
if (fileOutputStream != null) {
fileOutputStream.close();
fileOutputStream = null;
}
} catch (Exception e) {
}
}
return “File saved succesfully.”;
}
}
下麵是服務端的描述

service.xml檔案的內容為:
org.sky.axis2.attachment.FileUploadService
該服務端接受客戶端上傳的附件後使用UUID重新命名上傳的檔案名,並將其存入服務端的” D:/upload/axis2/”目錄中。
來看客戶端程式碼
org.sky.axis2.attachment.FileUploadClient
package org.sky.axis2.attachment;
import java.io.File;
import javax.activation.DataHandler;
import javax.activation.FileDataSource;
import javax.xml.namespace.QName;
import org.apache.axiom.om.OMAbstractFactory;
import org.apache.axiom.om.OMElement;
import org.apache.axiom.om.OMNamespace;
import org.apache.axiom.soap.SOAP11Constants;
import org.apache.axiom.soap.SOAPBody;
import org.apache.axiom.soap.SOAPEnvelope;
import org.apache.axiom.soap.SOAPFactory;
import org.apache.axis2.Constants;
import org.apache.axis2.addressing.EndpointReference;
import org.apache.axis2.client.OperationClient;
import org.apache.axis2.client.Options;
import org.apache.axis2.client.ServiceClient;
import org.apache.axis2.context.ConfigurationContext;
import org.apache.axis2.context.ConfigurationContextFactory;
import org.apache.axis2.context.MessageContext;
import org.apache.axis2.wsdl.WSDLConstants;
public class FileUploadClient {
private static EndpointReference targetEPR = new EndpointReference(
“http://localhost:8080/Axis2Service/services/AttachmentService”);
public static void main(String[] args) throws Exception {
new FileUploadClient().transferFile();
}
public void transferFile() throws Exception {
String filePath = “D:/deployment/test.jpg”;
String destFile = “test.jpg”;
Options options = new Options();
options.setTo(targetEPR);
options.setProperty(Constants.Configuration.ENABLE_SWA,
Constants.VALUE_TRUE);
options.setSoapVersionURI(SOAP11Constants.SOAP_ENVELOPE_NAMESPACE_URI);
options.setTimeOutInMilliSeconds(10000);
options.setTo(targetEPR);
options.setAction(“urn:uploadFile”);
ConfigurationContext configContext = ConfigurationContextFactory
.createConfigurationContextFromFileSystem(
“D:/wspace/Axis2Service/WebContent/WEB-INF/modules”,
null);
ServiceClient sender = new ServiceClient(configContext, null);
sender.setOptions(options);
OperationClient mepClient = sender
.createClient(ServiceClient.ANON_OUT_IN_OP);
MessageContext mc = new MessageContext();
FileDataSource fileDataSource = new FileDataSource(new File(filePath));
// Create a dataHandler using the fileDataSource. Any implementation of
// javax.activation.DataSource interface can fit here.
DataHandler dataHandler = new DataHandler(fileDataSource);
String attachmentID = mc.addAttachment(dataHandler);
SOAPFactory fac = OMAbstractFactory.getSOAP11Factory();
SOAPEnvelope env = fac.getDefaultEnvelope();
OMNamespace omNs = fac.createOMNamespace(
“http://attachment.axis2.sky.org”, “”);
OMElement uploadFile = fac.createOMElement(“uploadFile”, omNs);
OMElement nameEle = fac.createOMElement(“name”, omNs);
nameEle.setText(destFile);
OMElement idEle = fac.createOMElement(“attchmentID”, omNs);
idEle.setText(attachmentID);
uploadFile.addChild(nameEle);
uploadFile.addChild(idEle);
env.getBody().addChild(uploadFile);
System.out.println(“message====” + env);
mc.setEnvelope(env);
mepClient.addMessageContext(mc);
mepClient.execute(true);
MessageContext response = mepClient
.getMessageContext(WSDLConstants.MESSAGE_LABEL_IN_VALUE);
SOAPBody body = response.getEnvelope().getBody();
OMElement element = body.getFirstElement().getFirstChildWithName(
new QName(“http://attachment.axis2.sky.org”, “return”));
System.out.println(element.getText());
}
}
註意紅色加粗部分的程式碼,由其是:
FileDataSource fileDataSource = new FileDataSource(new File(filePath));
String attachmentID = mc.addAttachment(dataHandler);
這兩句就是把客戶端需要上傳的附件轉成AttachmentId的陳述句,然後把這個AttachementId作為一個OMElement的型別加入到客戶端的soap request中去即可:
OMElement idEle = fac.createOMElement(“attchmentID”, omNs);
idEle.setText(attachmentID);
uploadFile.addChild(nameEle);
uploadFile.addChild(idEle);
env.getBody().addChild(uploadFile);
來看執行效果。
客戶端:
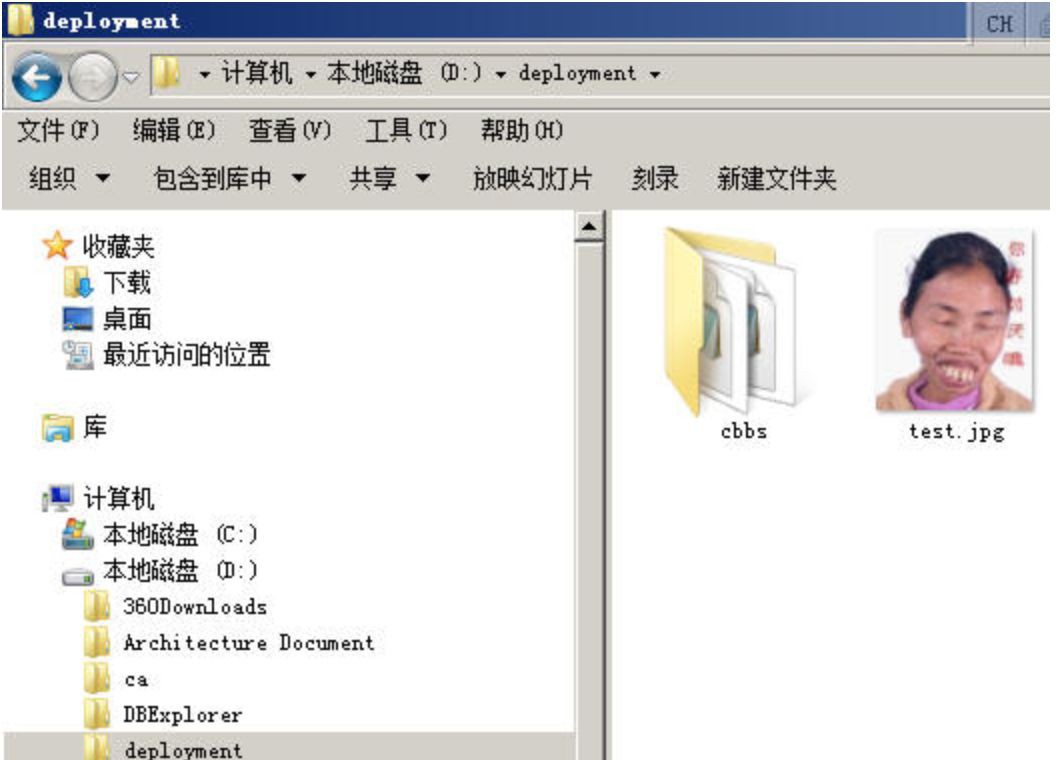
上傳d:/deployment/test.jpg檔案


客戶端收到服務端傳回的”File saved successfully”即可在服務端的” D:/upload/axis2”目錄中查詢是否成功上傳了該檔案了

可以看到,由於我們使用的是UUID因此每次上傳,服務端的檔案名都不會重覆。
附錄 UUID.java
package org.sky.axis2.util;
public class UUID {
protected static int count = 0;
public static synchronized String getUUID() {
count++;
long time = System.currentTimeMillis();
String timePattern = Long.toHexString(time);
int leftBit = 14 – timePattern.length();
if (leftBit > 0) {
timePattern = “0000000000”.substring(0, leftBit) + timePattern;
}
String uuid = timePattern
+ Long.toHexString(Double.doubleToLongBits(Math.random()))
+ Long.toHexString(Double.doubleToLongBits(Math.random()))
+ “000000000000000000”;
uuid = uuid.substring(0, 32).toUpperCase();
return uuid;
}
}
系列
看完本文有收穫?請轉發分享給更多人
關註「ImportNew」,提升Java技能

 知識星球
知識星球